...
Either
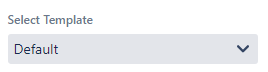
Select which template to use from the dropdown
Upload a new template. See Creating a new PPTX Template

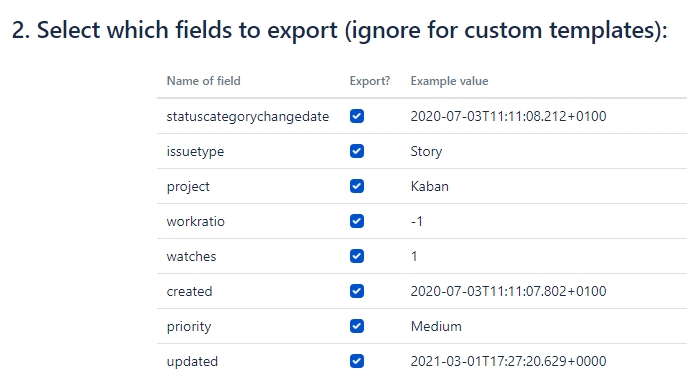
(optional) If using the Default template then use the checkboxes to select which fields should be exported. If you are using a custom template then you will not need to do this.

Press The Export button


Creating a new PPTX Template
The uploaded file can have any number of slides, but only the first slide with an “issue.fieldName” text on it will be copied and templated for each issue. The replaceable slide will keep its position in the presentation.
To have fields shown in a particular text box or location insert the text issue.fieldName, replacing “fieldName” with the name of the field you wish to have displayed there. For example: issue.key
You can see which field names are available for your selected ticket in the “Name of field” column on the Export to PPTX page.
.png?version=1&modificationDate=1616015372787&cacheVersion=1&api=v2)
.png?version=1&modificationDate=1616015372787&cacheVersion=1&api=v2&width=515)
On the Export to PPTX page, click the Choose file button.
Select your template PPTX file
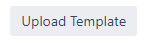
Then press the Upload Template button
Once uploaded, you will receive a notification and the new template will be automatically selected. You can then proceed with step 3 of the Generic Export Steps.
...
Additionally, you can add the text “|caption” and each image will have the title of the image as a caption below it. To achieve this you need the text in a textbox to be “issue.attachment|caption”.
Comments
You can include in your exports either the first or the last comment on an issue by using “issue.comments.first” or “issue.comments.last”.
Dates
You can format dates to appear in custom formats by adding format on the end of the field and passing in a format parameter. e.g issue.created.format(“DDth MMM”) which would output dates like “12th Dec”. Currently only DD, th and MMM are supported. If you need additional date formatting needs please email exporttopptxjira@grovr.co.uk.
Links
Parts of link URLs can also be replaced in custom templates, just use fields in the Address section like you would in a normal Text Box. e.g. http://grovrdev.atlassian.net/browse/issue.key and they will be replaced as with other text.
...
You can set a maximum number of rows per slide (to stop tables overflowing slides) by adding a TextBox with the contents issue.table.maxrows=5 or table.maxrows=5 where 5 is the maximum number of non-header rows you want on a slide. The slide with the table will be duplicated a number of times in order to display all the issues.
...
Then this will be processed and exported as the following:
...
Automated Export
You can make use of Jira’s Automation tools and Export to PPTX for Jira in order to have a templated presentation emailed to you on a regular schedule:
Navigate to the Jira automation page and create a New Rule
Use the “Scheduled” trigger and setup the timing as you would like it

Select “Next” or “New Component” and click on “Then: Add an action”

Search for and select “Lookup Issues”

Type or paste in the JQL which will select which issues you want exported and then press Next
Select “Then: Add an action” again

Search for and select “Send web request”

Set the following fields
HTTP method as “POST”
Web request body as “Custom data”
Enter the following into the “Custom data” text box
Code Block { "issueKeys": "{{#lookupIssues}}{{key}},{{/}}", "baseUrl": "The root url of your JIRA e.g. grovrdev.atlassian.net", "templateName": "The name of the your template", "sharedSecret": "a secret code" }“baseUrl” should be set to the start of your Jira url, e.g. “grovrdev.atlassian.net”
“templateName” should be set to the name of the template you which to export as shown in the “Select template” dropdown on the standard Export to PPTX page. (You cannot use the Default template here)
“sharedSecret” should be set to a secret value for each different Jira instance. Please email exporttopptxjira@grovr.co.uk to request a sharedSecret.
Add the following header with Key “Content-Type” and Value “Application/JSON”
You should end up with something resembling the following

Select “Next” or “New Component” and click on “Then:
...
Add an action”

Search for and select “Send email”

Set to “To” and “Subject” fields as you would like and then you can use {{webResponse.body}} in the body in order to include a link to the exported presentation

Finally, click “Turn On” to activate your rule and use the “…” menu and select “Run Rule” to test that it is all setup correctly. Depending on the number of issues exported and the complexity of the template it may take some time for the email to be sent.
If you encounter any difficulties, please email exporttopptxjira@grovr.co.uk
Large Presentation Warning
If a presentation is particularly large or created for a large number of issues, it may take a long time for the export to generate. The Jira automation “Send Web Request” has a fixed timeout of 30 seconds. So if you try and use the /automatedExport endpoint for a large export, your request may time out.
In this case, you can use the /automatedExportImmediate endpoint which will immediately return a 200 with the body containing the url of where the Exported Presentation will eventually be. This url will return a 403 error until the Exported Presentation has been fully created and uploaded at which point the url will download the presentation the same as the /automatedExport endpoint. So for larger presentations, replace the /automatedExport endpoint with /automatedExportImmediate and add some text to the email explaining that it may take a few minutes for the presentation to be available.
If an error occurs during the creation of the export, then the url will return an error message.
Parent and Child Presentations
...