To use the legacy version of the Cloud plugin, see CSV to Table Legacy Documentation
For older versions of Confluence, see CSV To Table for Confluence 6.x Documentation
...
- Start typing /csv and select CSV to Table for Confluence
 Sortable
- Select the edit icon

- You should see the following:
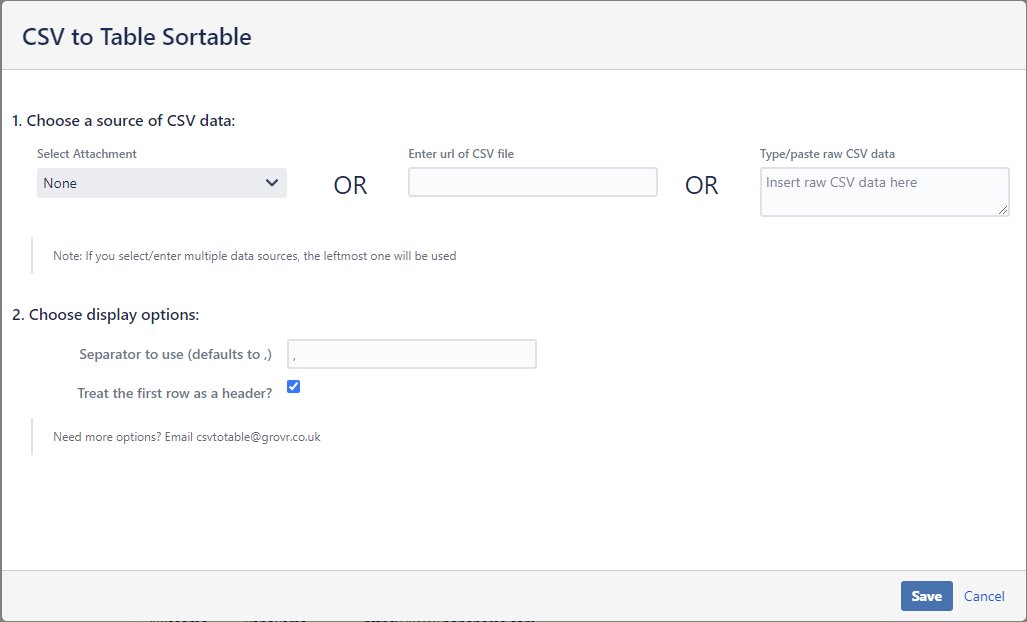
Choose your CSV data by either:

- Tick the box if you want the first row to be a header.
Selecting an attachment
Entering a URL
Typing or pasting in the CSV data

- Change the separator field if you want to use anything other than ,Either
- Set the Remote Url field to the url of a remote CSV if you want your CSV data to come from there. Type or paste the contents of your CSV into the "Insert Text" area
- Untick the box if you don't want the first row to be a header.
- Press "Save"